 |
| Disclaimer: I am writing this for the benefit of inexperienced folk who might want to build a simple building. If I seem a bit pedantic it's only because I am. During the winter our garage is quite crowded with our car and tractor, leaving very little room for my woodworking tools. A friend happened to give me some twelve foot roof trusses from a building which he had taken down, so I decided a twelve by sixteen shed would do very nicely to house my tractor and snogo during the winter. First I needed to haul some sandy fill to the site. |
 |
| I hauled more than twenty bucketfuls of dirt and leveled it out a bit. Since it would have a dirt floor I wasn't too particular. |
 |
| Next I build a 12x16 foot frame from 2x8 treated lumber, squared it and added temporary corner braces. The trusses are stacked in the backround. |
 |
| I used the frame to determine the location of my post holes and marked these with thin stakes. Then I moved the frame to give me room... |
 |
| to dig holes with a hand posthole digger. This tool is a joy to use, especially when you hit rocks and roots. I dug the holes down into the subsoil, about a foot deep. |
 |
| Then I moved the frame back into place and leveled it using blocks of wood to support it. I believe I wound up using this concrete block at one corner. |
 |
| I measured the distance from the frame to the bottom of each hole and cut 4x4 treated posts to those approximate lengths with my tablesaw. I also rabbeted the end of each post the to accomodate the 2x8 frame. |
 |
| I then inserted the posts into the holes and screwed them to the frame. |
 |
| Bear in mind that most of the posts are actually suspended a bit off the ground. I have built a number of small buildings this way and it has worked well. |
 |
| Ready mix concrete is something of an oxymoron. It's not really ready mixed, you still have to mix it a lot as you add water, and if you do it by hand you will get plenty of exercise. Here I am mixing two 80 pound bagfuls in my wheelbarrow, adding water slowly. I make it quite loose. |
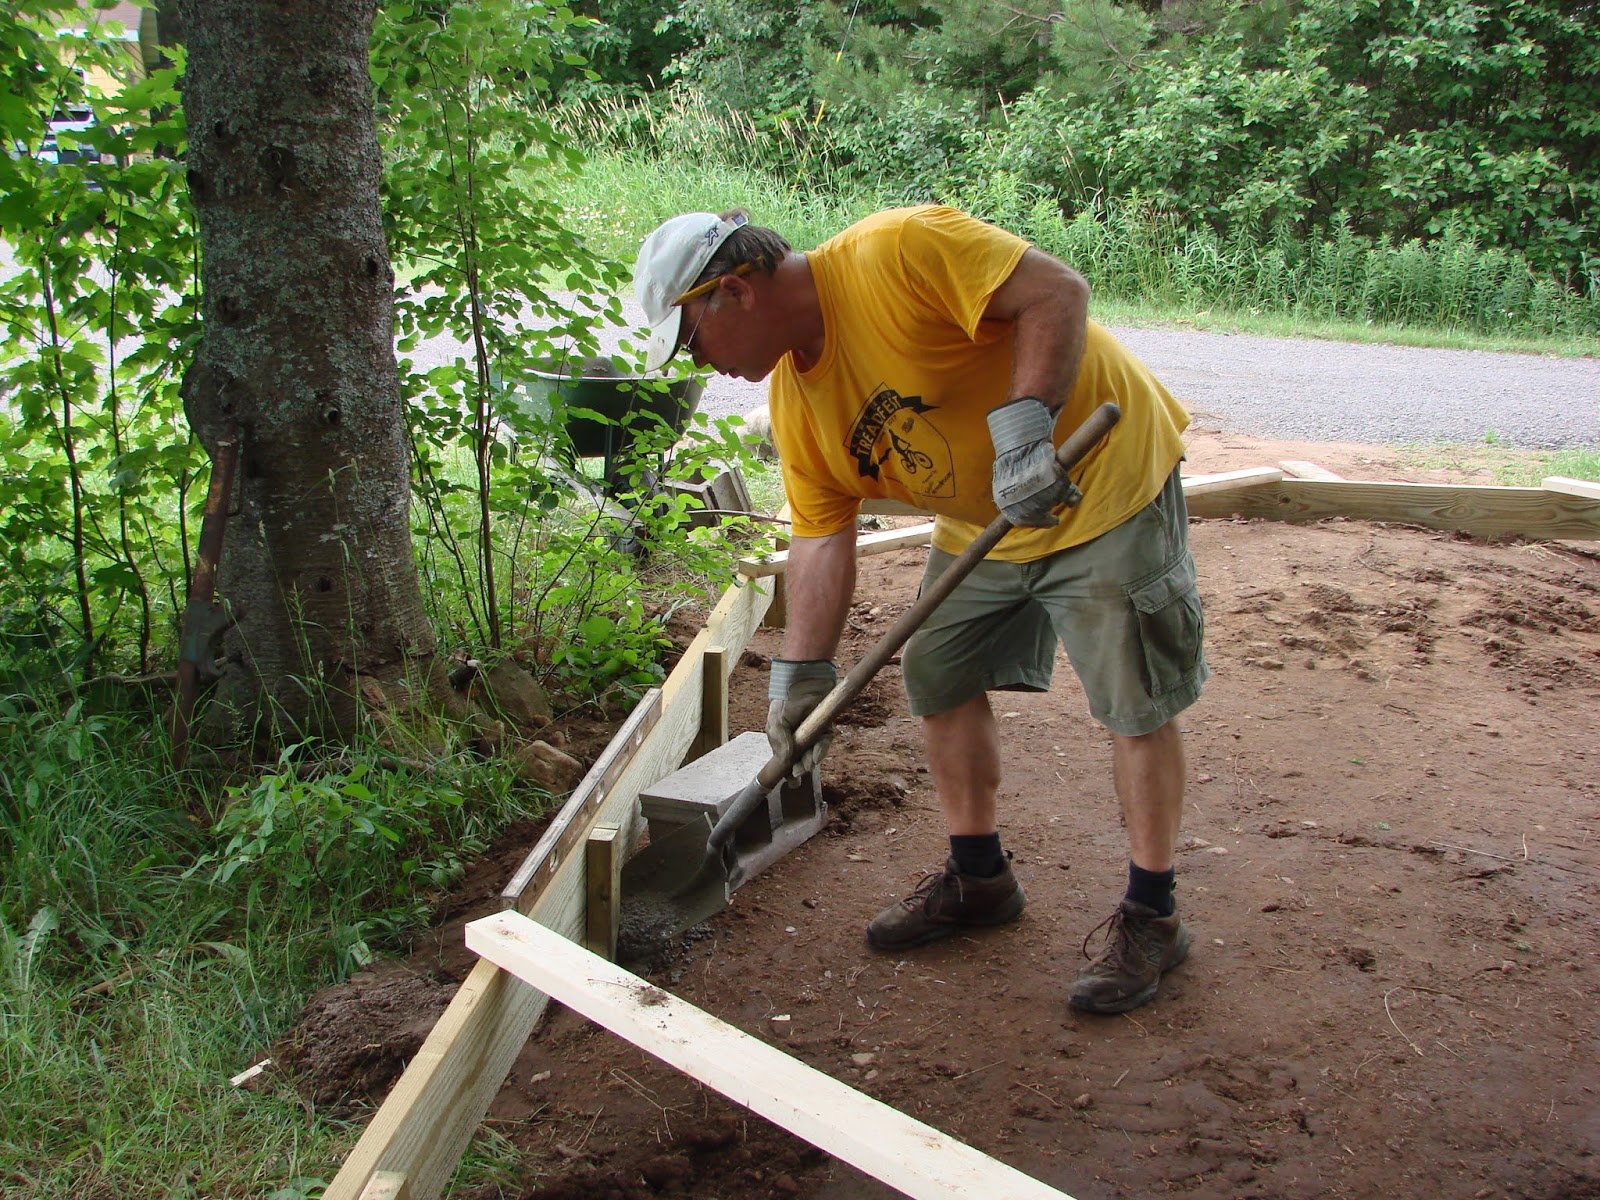 |
| Next I shovel it into the holes around the posts. |
 |
| I also have a hand trowel which I use in some of the tighter spots. |
 |
| It is important to work the concrete with a stick to ensure that it fills all the gaps and does not leave and hollow spaces under the posts. |
 |
| Next I framed the walls using an old fashioned framing hammer. Nowadays builders use compressors and nail guns, but I appreciate getting a sore back, shoulders and elbows doing it the hard way. I had forgotten how much fun this is. I even had to start wearing a glove when my hand started to develop a blister. |
 |
| Here's the fun part. |
 |
| Sam helped me raise the walls. |
 |
| You always get a sense of accomplishment when the walls go up. It's actually only a very small part of the construction but it always looks impressive. |
 |
| Nailing the wall to the frame. |
 |
| I squared and braced the walls with spare 2x4's |
 |
| Time to put up the roof trusses. For some reason I didn't get any pictures of me nailing the 1/2 inch plywood sheathing to the walls. I guess I didn't want to document the misery. On the other hand pounding nails all day is much better than a sharp stick in the eye. To make the job a little easier I screwed a long 2x4 to the foundation frame to serve as a shelf to support the plywood for nailing. It's much easier to get your plywood even when it sits on a board. I could have nailed it onto the walls while they were lying flat, but I'd rather nail standing than kneeling. |
 |
| Here's where a front end loader comes in handy. |
 |
| It served as an excellent stand to hold the trusses at a comfortable height while I removed the old toe nails..... |
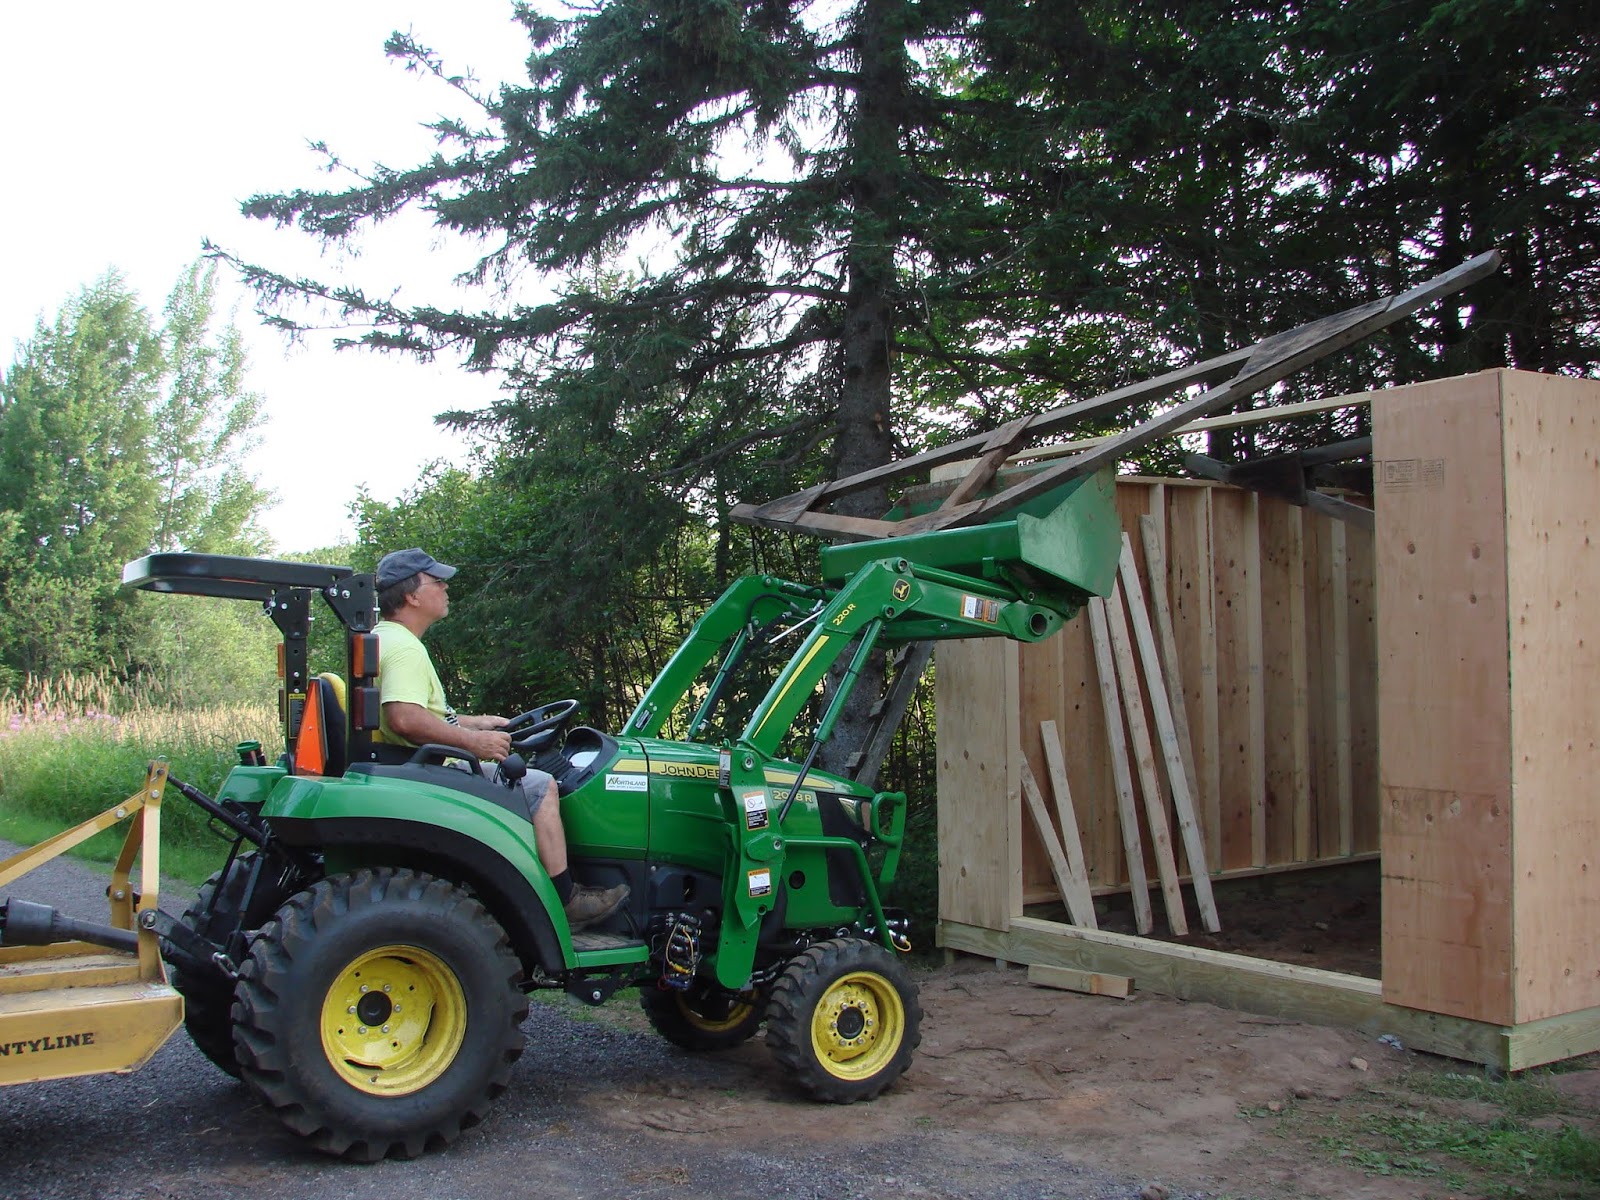 |
| ....and it made lifting the trusses onto the walls effortless. I could have manhandled them up there if I had to, but after a certain age you realize that gravity is not your friend. |
 |
| Once on the walls, it was a simple matter to give them a bit of a push... |
 |
| ...and slide them forward. They hang on the walls nicely upside down. |
 |
| All that remains it to slide them into place, flip them rightside up... |
 |
| ...and toenail them to the top plate |

 |
| I added some temporary studs and blocks on the ends to secure the outside trusses and also tacked on a couple of 2x4's along top of the trusses to keep them erect. To be continued... |

No comments:
Post a Comment